Building a Timeline Component with the SPFx SharePoint Framework
Let’s get you a Timeline component you can use for several use cases, in a chronologic way to represent information or just another way you want to represent items from a SharePoint List that makes sense to you.
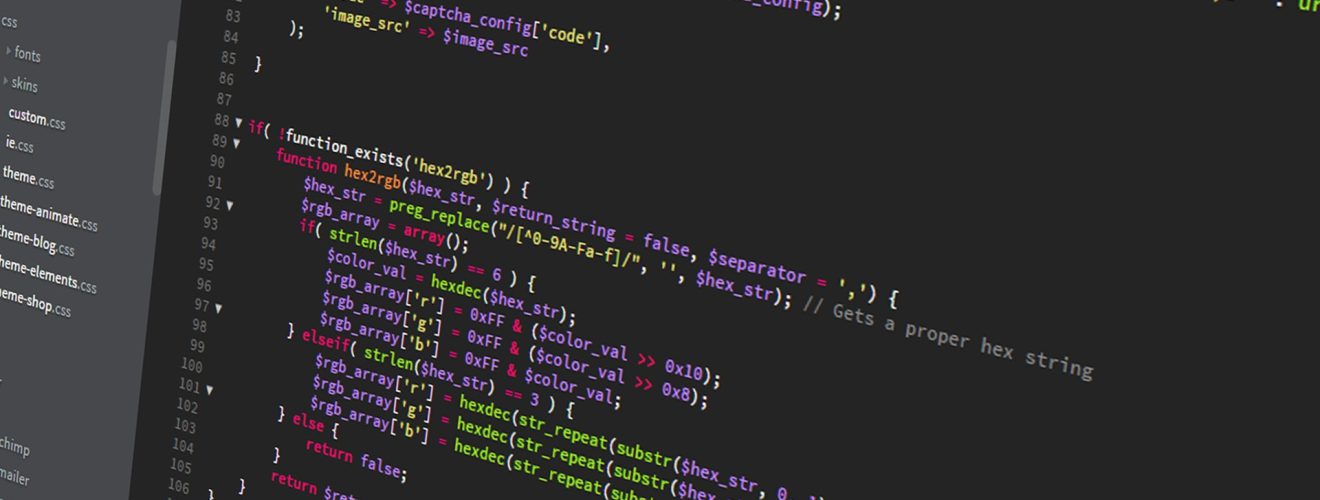
I’m using in this sample Class Components because at the time of this post there is no native Functional Components in the Chain. If you want FCs Functional Components it’s not a big deal to convert it. See my post here and my opinion about that.
What tools we are going to use?
"react-vertical-timeline-component": "^3.6.0"
"@pnp/logging": "^3.13.0"
"@pnp/sp": "^3.13.0"
"csstype": "^3.1.2"
"@material-ui/icons": "^4.11.3"
Means you want to install
npm i react-vertical-timeline-component@3.6.0
npm i --save-dev @types/react-vertical-timeline-component
npm i csstype@3.1.2
npm install @material-ui/icons@4.11.3
npm install @pnp/logging@3.13.0 @pnp/sp@3.13.0 --save- To add package in dependencies use
--save - To add package in devDependencies
--save-dev
Intro to PnPjs V3 transition guide
The PnPjs V3 have a lot of new features and you should see this video by Julie Turner in the Microsoft 365 & Power Platform Community PnP
Follow the article in the Microsoft Learning Sample it will guide you
YOUR PROJECT
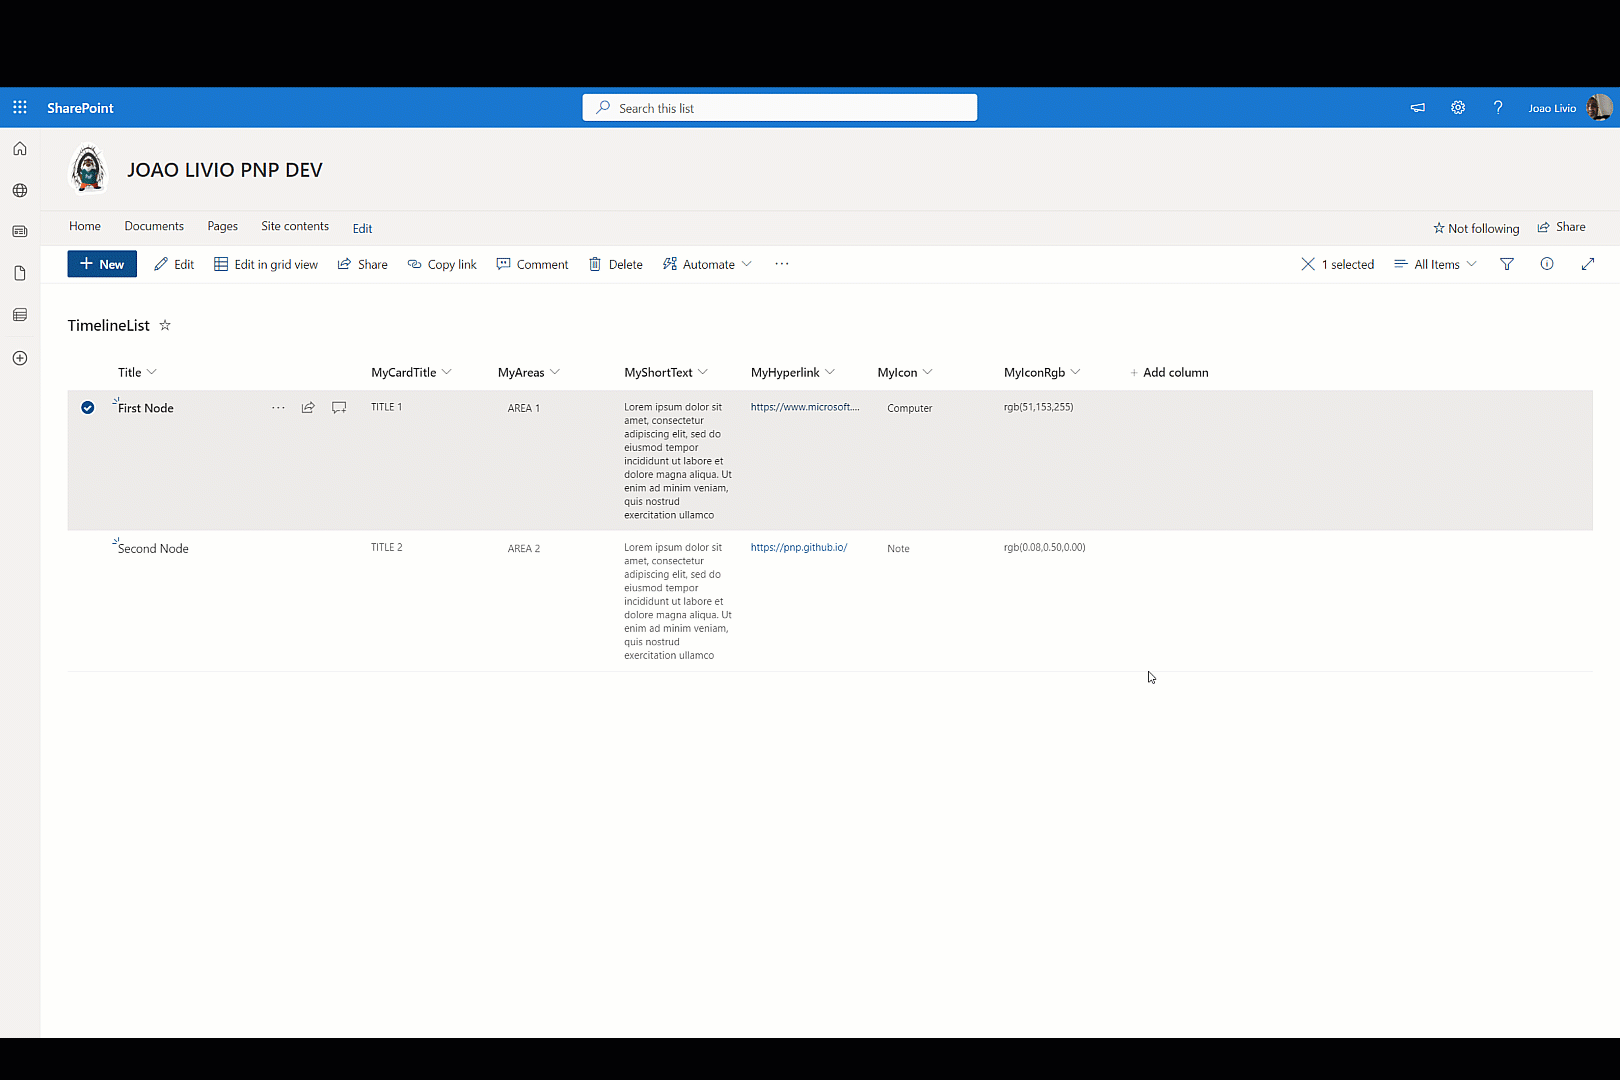
So let’s abstract the version of SPFx, let’s assume you have this List CREATE and Fill Information
| Field Name | Field Type |
| Id | Number |
| Title | Single line of text |
| MyAreas | Choice |
| MyShortText | Single line of text |
| MyHyperlink | Hyperlink or Picture |
| MyIconRgb | Single line of text |
| MyIcon | Choice |
| MyCardTitle | Single line of text |
Now lets build our Interfaces with our Modules
//Create a Folder "interfaces" inside "scr" and a file "modules.ts" inside "interfaces"

//Create response. Names must match the List Internal Names
export interface IListModelResponse {
    Id: number;
    Title: string;
    MyCardTitle: string;
    MyAreas: string;
    MyShortText: string;
    MyHyperlink: IUrlLink;
    MyIcon: string;
    MyIconRgb: string;
}

//Create the Url from the Hyperlink Field
export interface IUrlLink {
    Url: string;
}

//Create the Timeline Model
export interface IListModel {
    Id: number;
    TimelineNodeTitle: string;
    CardTitle: string;
    ChoiceArea: string;
    ShortText: string;
    Link: string
    ChoiceIcon: string;
    RgbColor: string;
}
Now let’s create our State
import { IListModel } from "../../../interfaces/models";
export interface CHAGE_ME_FOR_YOUR_WP_State {
  items: IListModel[];
  errors: string[];
}

export interface YOUR_WP_Props{
  // .... Omitted for abreviation
}
After you Follow the Article in the Microsoft Learn let’s let’s build and workaround on the Code for our React Component
ADD some CSS to manage our react-vertical-timeline-component. Create the file “timelineStyle.css” under the folder “webparts”
.vertical-timeline::before {
    content: "";
    position: absolute;
    top: 0px;
    left: 18px;
    height: 100%;
    width: 4px;
    background:black!important;
}
IMPORTS
// .... Omitted for abreviation

import { VerticalTimeline, VerticalTimelineElement } from 'react-vertical-timeline-component';
import 'react-vertical-timeline-component/style.min.css';
import StarIcon from '@material-ui/icons/Star';

import "../../YOUR_WP_NAME/timelineStyle.css";
import * as CSS from "csstype";
import { Computer, NoteRounded, SquareFootOutlined } from '@material-ui/icons';

// .... Omitted for abreviation
The CSStype It provides autocompletion and type checking for CSS properties and values.
const style: CSS.Properties<string | number> = {

};
So let’s create a Background Colour for our Component
const BackStyle: CSS.Properties<string | number> = {
  background: 'rgb(227, 227, 227)'
};
OUR CLASS
// .... Omitted for abreviation

const BackStyle: CSS.Properties<string | number> = {
  background: 'rgb(227, 227, 227)'
};

export default class YOUR_CLASS extends React.Component<YOUR_WP_Props, CHAGE_ME_FOR_YOUR_WP_State> {
  private LOG_SOURCE = "PNP_JS";
  private LIST_SOURCE = "YOUR_LIST_NAME"
  private _sp: SPFI;


  constructor(props: YOUR_WP_Props) {
    super(props);
    // set initial state
    this.state = {
      items: [],
      errors: []
    };
    this._sp = getSP();
  }

  public componentDidMount(): void {
    // read all items to Timeline
    this._readTimeline();
  }

public render(): React.ReactElement<YOUR_WP_Props> {
    try {
      const {
       // .... Omitted for abreviation
      } = this.props;

      return (
        <section className={`${styles.myTimeline} ${hasTeamsContext ? styles.teams : ''}`}>
          <div className={styles.welcome}>
            <img alt="" src={isDarkTheme ? require('../assets/welcome-dark.png') : require('../assets/welcome-light.png')} className={styles.welcomeImage} />
            <h2>Well done, {escape(userDisplayName)}!</h2>
            <div>{environmentMessage}</div>
            <div>Web part property value: <strong>{escape(description)}</strong></div>
          </div>
          <div>
            <br /><br /><br />
            <div style={BackStyle}>
              <VerticalTimeline>
                <VerticalTimelineElement
                  iconStyle={{ background: 'rgb(16, 204, 82)', color: '#fff' }}
                  icon={<StarIcon />}
                />

                {this.state.items.map((item, idx) => {
                  return (
                    <VerticalTimelineElement
                      key={idx}
                      className="vertical-timeline-element--work"
                      date={item.TimelineNodeTitle}
                      iconStyle={{ background: item.RgbColor, color: '#fff' }}
                      icon={item.ChoiceIcon === "Computer" ? <Computer /> : <NoteRounded />}
                    >
                      <h3 className="vertical-timeline-element-title">{item.CardTitle}</h3>
                      <h4 className="vertical-timeline-element-subtitle">{item.ChoiceArea}</h4>
                      <p>
                        {item.ShortText} <br /><br />
                        <a href={item.Link} target="_blank" rel="noreferrer">OPEN LINK</a>
                      </p>
                    </VerticalTimelineElement>
                  );
                })}

                <VerticalTimelineElement
                  iconStyle={{ background: 'rgb(204,0,0)', color: '#fff' }}
                  icon={<SquareFootOutlined />}
                />
              </VerticalTimeline>
            </div>
          </div>
        </section>
      );
    } catch (err) {
      Logger.write(`${this.LOG_SOURCE} (render) - ${JSON.stringify(err)} - `, LogLevel.Error);
    }
    return null;
  }

// Your CAll
private _readTimeline = async (): Promise<void> => {
    try {
      // do PnP JS query, some notes:
      //   - .get() always returns a promise
      //   - await resolves proimises making your code act syncronous, ergo Promise< IListModelResponse[]> becomes IListModel[]

      //Extending our sp object to include caching behavior, this modification will add caching to the sp object itself
      //this._sp.using(Caching("session"));

      //Creating a new sp object to include caching behavior. This way our original object is unchanged.
      //const spCache = spfi(this._sp).using(Caching("session"));

      const response: IListModelResponse[] = await this._sp.web.lists
        .getByTitle(this.LIST_SOURCE)
        .items
        .select("Id", "Title", "MyCardTitle", "MyAreas", "MyShortText", "MyHyperlink", "MyIcon", "MyIconRgb")();

      // use map to convert IListModelResponse[] into our internal object IListModel[]
      const items: IListModel[] = response.map((item: IListModelResponse) => {
        return {
          Id: item.Id,
          TimelineNodeTitle: item.Title || "Unknown",
          CardTitle: item.MyCardTitle || "Unknown",
          ChoiceArea: item.MyAreas || "Unknown",
          ShortText: item.MyShortText || "Unknown",
          Link: item.MyHyperlink.Url || "Unknown",
          ChoiceIcon: item.MyIcon || "Unknown",
          RgbColor: item.MyIconRgb || "Unknown"
        };
      });

      // Add the items to the state
      this.setState({ items });
      console.log(items);
    } catch (err) {
      Logger.write(`${this.LOG_SOURCE} (_readTimeline) - ${JSON.stringify(err)} - `, LogLevel.Error);
    }
  }
}
UPDATE
Added GIT Repository
References